Monthly Archives: July 2013

Raspberry Pi Hardware Integration

A few weeks ago I got a Raspberry Pi to run in B.E.T.H. I had been running it all strewn around on the desk, but yesterday I finally got it all packed inside the chassis. Here’s a run down of what I did.

Parts:

IMG_0592

So as you can see, I mounted the Xbee breakout on the Pi Proto Plate. At first the Plate was sitting up too tall. It originally was the full length of the Raspberry Pi and spaced up enough using an extended header that it covered the ethernet and USB ports. I ended up cutting the board down and mounting it on a standard height header so it could sit lower. I mounted the Pi by glue gunning it to plastic standoffs which screw into the chassis.

IMG_0590

As for power, I’m running the battery power into the regulator breakout board and using it as a distribution block to jumper battery power to the power Dynamixel hub. The 5V output of the regulator goes to the Raspberry Pi. I’m powering the Pi through the GPIO power pins accessed through the Pi Proto Plate.

IMG_0594

I plan to order shorter Dynamixel cables and shorten up the battery/switch wires to clean things up, but as of now it looks like this:

IMG_0598

Unfortunately the battery has to go on top of the robot. I now run the wifi adapter and USB2AX in the Pi’s USB ports. I then SSH and/or VNC in over the network to work on bot. If i have to I can reach in and plug a USB hub cable in in place of the wifi adapter.

Back to B.E.T.H.’s main index.

Phase 4: Foot Trajectory Planning and Gait Sequencing Part II

In the previous post, I went over my initial linear approach to stepping and why it didn’t work out so well. This post outlines my current method which is working much better.

The new method uses a sinusoidal “arch” shaped step in the ZX plane. This also works out well since a single sine function can cover the raise and lower part of the step in one time segment. By using a sinusoidal function for the front-to-back stepping in the X direction as well, i could cut the number of case in half to just two. The final benefit is that it produces a very smooth and natural motion with the smooth curves and foot speeds. Here’s what step code looks like:

switch (caseStep[legNum]){

                case 1: //forward raise and lower

                    leg[legNum].footPos.x = -amplitudeX*cos(M_PI*tick/numTicks);
                    leg[legNum].footPos.y = -amplitudeY*cos(M_PI*tick/numTicks);
                    leg[legNum].footPos.z = -abs(amplitudeZ)*sin(M_PI*tick/numTicks);

                    if( tick >= numTicks-1 ) caseStep[legNum] = 2;
                    break;

                case 2: // pull back

                    leg[legNum].footPos.x = amplitudeX*cos(M_PI*tick/numTicks);
                    leg[legNum].footPos.y = amplitudeY*cos(M_PI*tick/numTicks);
                    leg[legNum].footPos.z = 0;

                    if( tick >= numTicks-1 ) caseStep[legNum] = 1;
                    break;

          }// end of case statement

As you noticed, the sequencing itself is carried out by the case statement block. They key to the sequencing is in the caseStep[] array. The array has six elements, one for each leg. The variable defines at which case each leg begins. For a tripod gait, the front right leg (#1), rear right (#3), and middle left (#5) leg all start at the first case and step together. The other legs start 180deg off which is the second case. So for my prior four-case linear “triangle” step function, caseStep[] is defined as {1,3,1,3,1,3}. For the new two-case “sine” step function, caseStep[] is defined as {1,2,1,2,1,2}.

Each case statement increments caseStep[] to the next case in order to advance to the next portion of the foot step. The final code looks like:

/*************************************************
  tripodGaitSine()

**************************************************/
void tripodGaitSine(){

    float sinRotZ, cosRotZ;
    int totalX, totalY;
    float rotSpeedOffsetX[6], rotSpeedOffsetY[6];
    float amplitudeX, amplitudeY, amplitudeZ;
    int duration;
    int numTicks;
    int speedX, speedY, speedR;

    if( (abs(commanderInput.Xspeed) > 5) || (abs(commanderInput.Yspeed) > 5) || (abs(commanderInput.Rspeed) > 5 ) ){

        duration = 500;                               //duration of one step cycle (ms)
        numTicks = round(duration / SERVO_UPDATE_PERIOD / 2.0); //total ticks divided into the two cases

        speedX = 180*commanderInput.Xspeed/127;        //180mm/s top speed for 180mmm stride in one sec
        speedY = 180*commanderInput.Yspeed/127;        //180mm/s top speed
        speedR = 40*commanderInput.Rspeed/127;         //40deg/s top rotation speed

        sinRotZ = sin(radians(speedR));
        cosRotZ = cos(radians(speedR));

        for( int legNum=0; legNum<6; legNum++){                        totalX = leg[legNum].initialFootPos.x + leg[legNum].legBasePos.x;              totalY = leg[legNum].initialFootPos.y + leg[legNum].legBasePos.y;                          rotSpeedOffsetX[legNum] = totalY*sinRotZ + totalX*cosRotZ - totalX;               rotSpeedOffsetY[legNum] = totalY*cosRotZ - totalX*sinRotZ - totalY;                           if( abs(speedX + rotSpeedOffsetX[legNum]) > abs(speedY + rotSpeedOffsetY[legNum]) )
		amplitudeZ = ((speedX + rotSpeedOffsetX[legNum])*duration/3000.0);
            else
		amplitudeZ = ((speedY + rotSpeedOffsetY[legNum])*duration/3000.0);

            amplitudeX = ((speedX + rotSpeedOffsetX[legNum])*duration/2000.0);
            amplitudeY = ((speedY + rotSpeedOffsetY[legNum])*duration/2000.0);

            switch (caseStep[legNum]){

                case 1: //forward raise and lower

                    leg[legNum].footPos.x = -amplitudeX*cos(M_PI*tick/numTicks);
                    leg[legNum].footPos.y = -amplitudeY*cos(M_PI*tick/numTicks);
                    leg[legNum].footPos.z = -abs(amplitudeZ)*sin(M_PI*tick/numTicks);

                    if( tick >= numTicks-1 ) caseStep[legNum] = 2;
                    break;

                case 2: // pull back

                    leg[legNum].footPos.x = amplitudeX*cos(M_PI*tick/numTicks);
                    leg[legNum].footPos.y = amplitudeY*cos(M_PI*tick/numTicks);
                    leg[legNum].footPos.z = 0;

                    if( tick >= numTicks-1 ) caseStep[legNum] = 1;
                    break;

          }// end of case statement

        }// end of loop over legs
        if (tick < numTicks-1) tick++;
        else tick = 0;

    }//end if joystick active

}

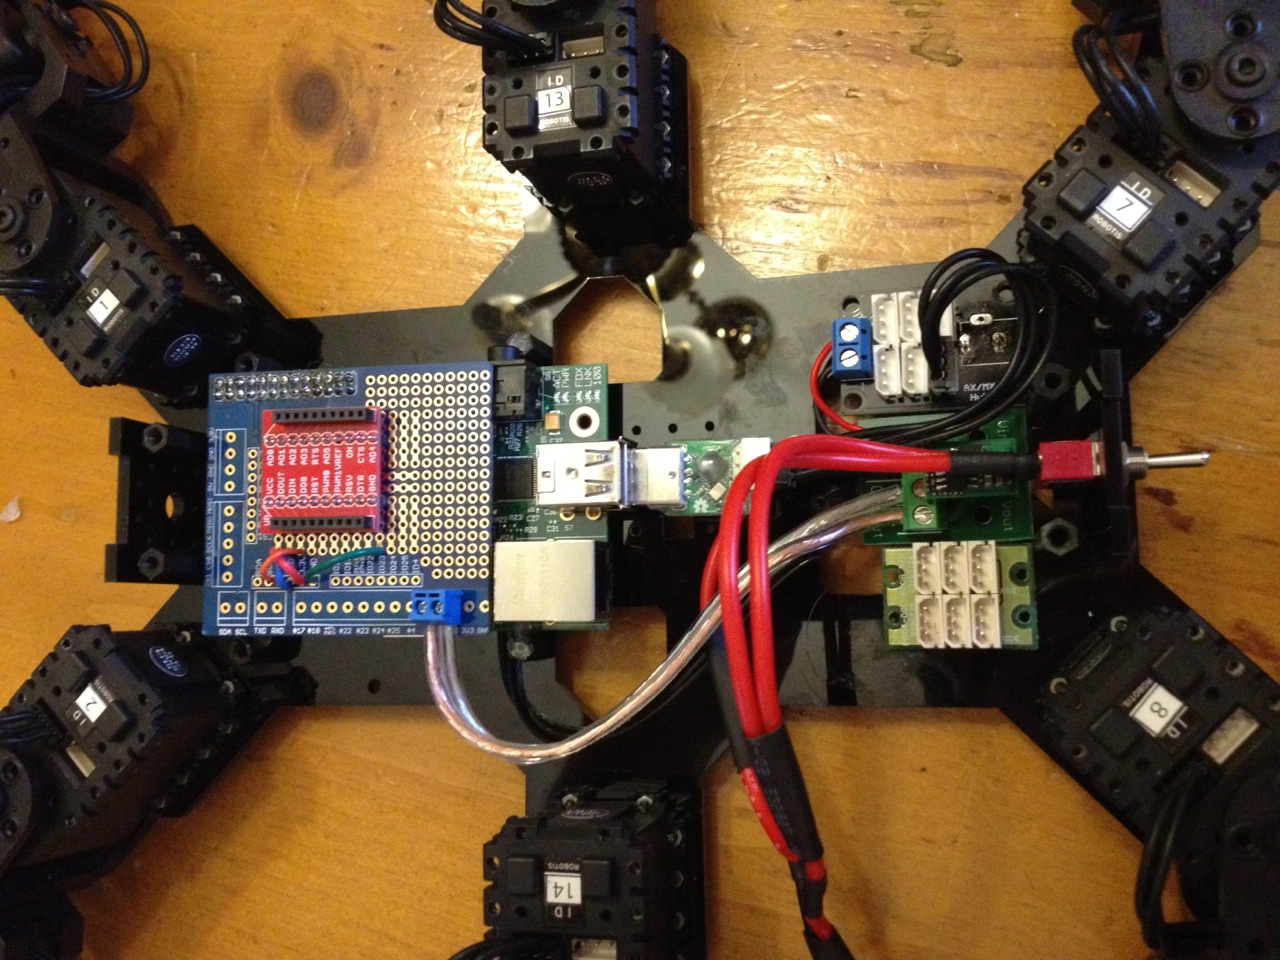
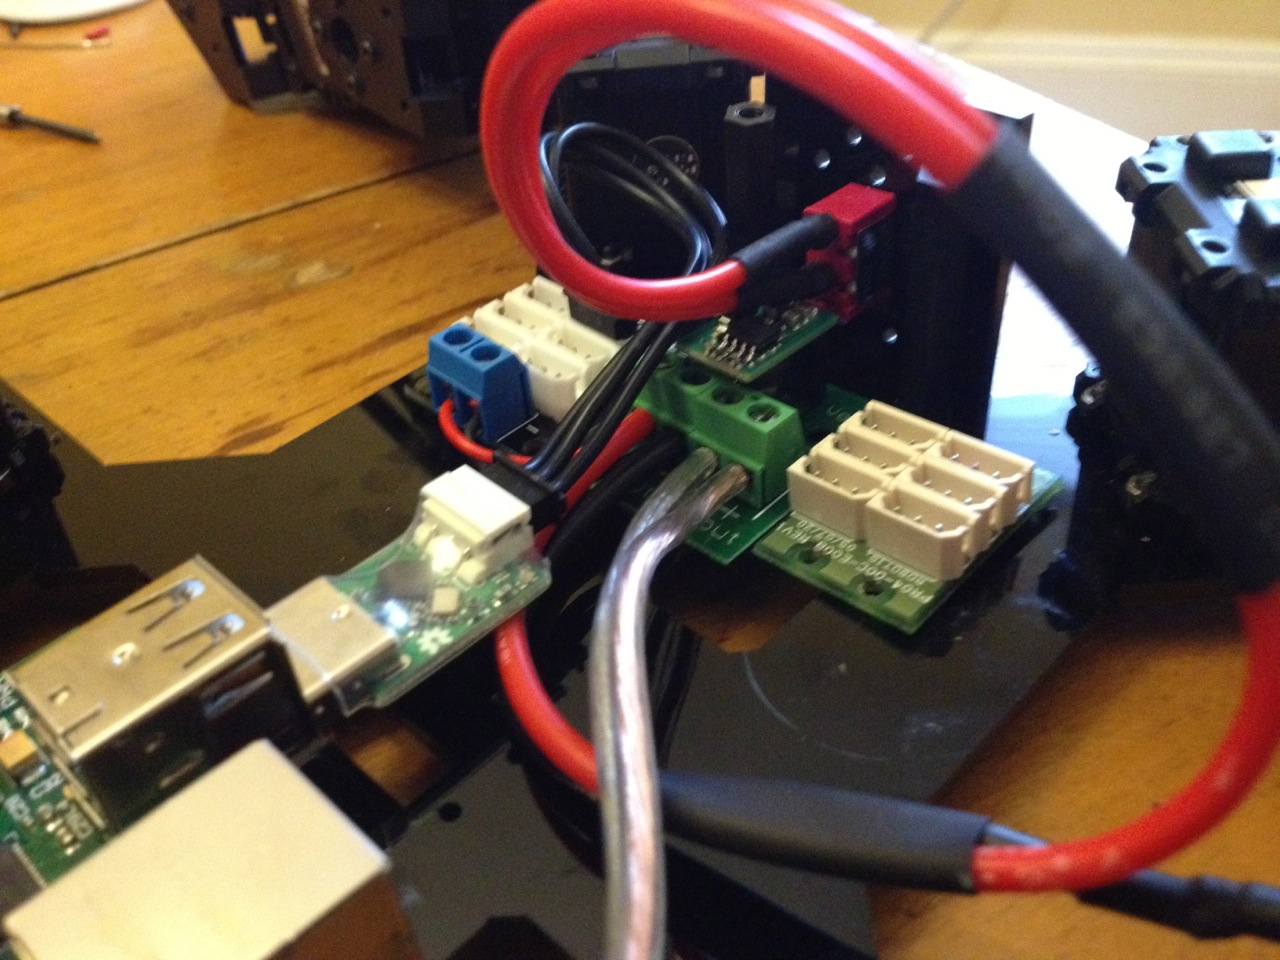
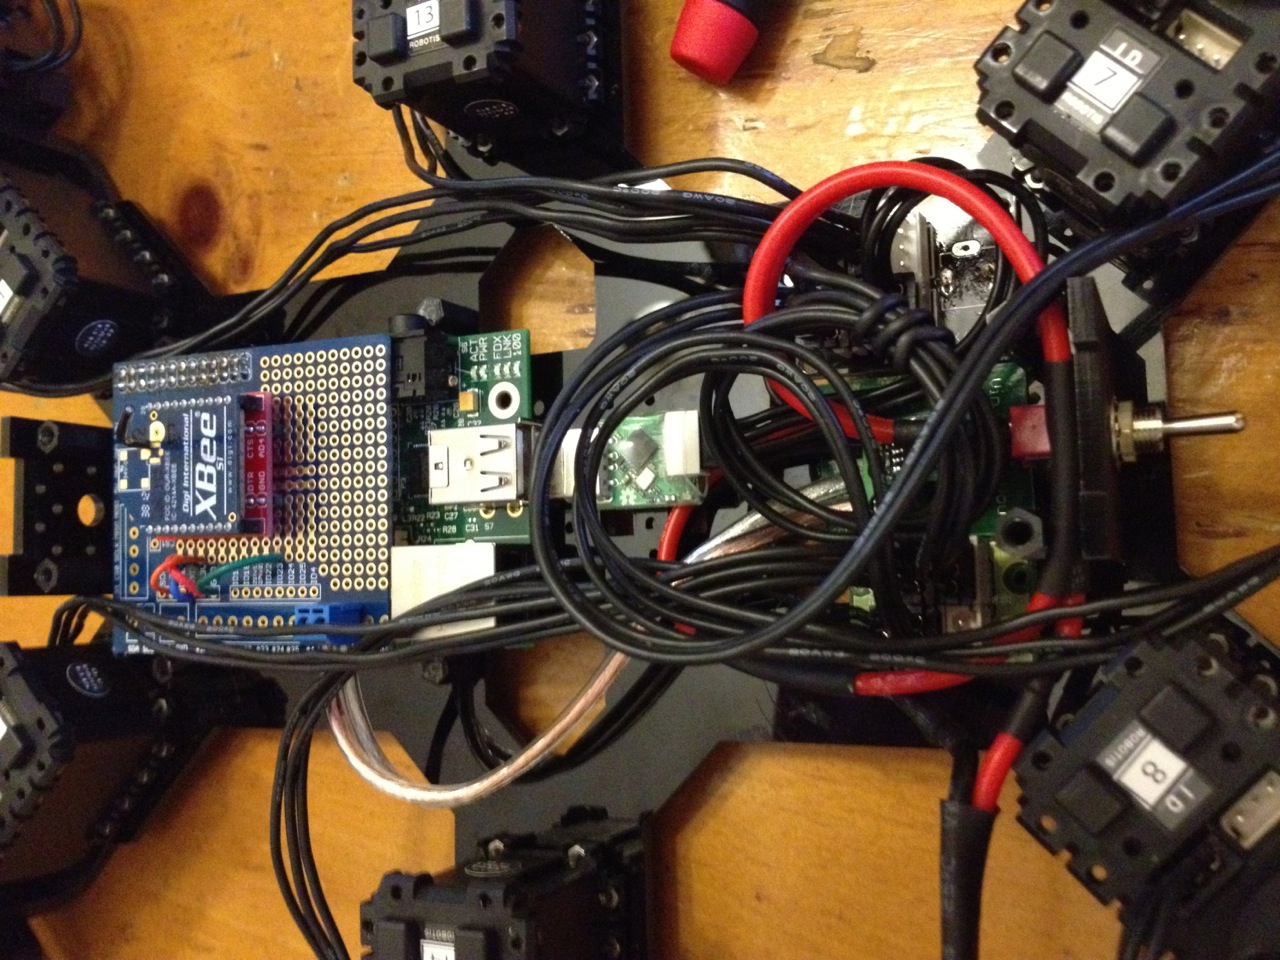
I think it needs a little fine tuning of the speeds and step durations, but its essentially done. B.E.T.H. is now fully mobile!

Check out where this all began.

Phase 4: Foot Trajectory Planning and Gait Sequencing Part I

Thanks to my handy IK engine, I no longer need to think in terms of joint angles. All i need to do is move the tip of the foot around in 3D space using the footPos.x, footPos.y, and footPos.z variables.   Stepping is really as simple as looping and incrementing them in such a way to produce the desired movement. Incrementing X moves the foot in the forward X direction. Incrementing X and Y at the same time moves the foot on that diagonal, etc.

I’ve been putting this post off for awhile because I keep changing how I’m implementing the foot stepping. I’ll go through the history for learning’s sake.

At first I was using linear equations to “draw” straight lines with the foot. A foot would step diagonally up and forward, down and forward, then pull back along the ground in the shape of a triangle.


            switch (caseStep[legNum]){

                case 1: //forward raise

                    leg[legNum].footPos.x = ((long)(speedX + strideRotOffsetX[legNum])*tick*SERVO_UPDATE_PERIOD)/duration - (speedX + strideRotOffsetX[legNum])/4;
                    leg[legNum].footPos.y = ((long)(speedY + strideRotOffsetY[legNum])*tick*SERVO_UPDATE_PERIOD)/duration - (speedY + strideRotOffsetY[legNum])/4;
                    leg[legNum].footPos.z = ((long)height*tick*SERVO_UPDATE_PERIOD)/(duration/4);

                    if( tick >= numTicks-1 ) caseStep[legNum] = 2;
                    break;

                case 2: // forward lower

                    leg[legNum].footPos.x = ((long)(speedX + strideRotOffsetX[legNum])*tick*SERVO_UPDATE_PERIOD)/duration;
                    leg[legNum].footPos.y = ((long)(speedY + strideRotOffsetY[legNum])*tick*SERVO_UPDATE_PERIOD)/duration;
                    leg[legNum].footPos.z = height - ((long)height*tick*SERVO_UPDATE_PERIOD)/(duration/4);

                    if( tick >= numTicks-1 ) caseStep[legNum] = 3;
                    break;

                case 3: // down pull back

                    leg[legNum].footPos.x = -((long)(speedX + strideRotOffsetX[legNum])*tick*SERVO_UPDATE_PERIOD)/duration + (speedX + strideRotOffsetX[legNum])/4;
                    leg[legNum].footPos.y = -((long)(speedY + strideRotOffsetY[legNum])*tick*SERVO_UPDATE_PERIOD)/duration + (speedY + strideRotOffsetY[legNum])/4;
                    leg[legNum].footPos.z = 0;

                    if( tick >= numTicks-1 ) caseStep[legNum] = 4;
                    break;

                case 4: // down pull back

                    leg[legNum].footPos.x = -((long)(speedX + strideRotOffsetX[legNum])*tick*SERVO_UPDATE_PERIOD)/duration;
                    leg[legNum].footPos.y = -((long)(speedY + strideRotOffsetY[legNum])*tick*SERVO_UPDATE_PERIOD)/duration;
                    leg[legNum].footPos.z = 0;

                    if( tick >= numTicks-1 ) caseStep[legNum] = 1;
                    break;

          }// end of case statement

This worked well and was fast to process on the Arduino, but it had a couple of issues. First, the leg movement looked a little rigid and unnatural. Sort of jerky with the sudden direction changes. Second and most importantly, the robot wasn’t walking smoothly forward. It would sort of stutter as it moved continuously in a direction. I realized that this was because the foot was coming down and hitting the ground in the opposite direction to travel. This caused a momentary halt in the forward momentum before the foot began to pull backwards. The foot should at least be coming straight down toward the ground before pulling back. I’ll explain how I do this once its ready for prime time.

To be continued in Part II!

Jump back to the beginning of Project B.E.T.H.

OEM Spindle Options for GTI: Steering Ratio Comparison

The stock GTI spindles are cast iron which means heavy, rusty, and even prone to cracking under heavy track use. Fortunately, there are a couple of OEM forged aluminum options that remedy all of the above. The Audi S3/VW Passat spindle is geometrically identical to the GTI spindle except for having a slightly shorter steering arm. The Audi TT spindle offers a lower lower ball joint mounting point to improve roll center which is great, but it it also has a much longer steering arm. The length of the steering arm directly effects how far the wheel is angled per amount of tie rod travel. The longer the arm, the less wheel angle you get for a given amount of tie rod travel.

The stock VW GTI arm has a 10cm steering arm. The forged aluminum Audi S3/VW Passat spindle has a shorter 9.6cm steering arm. Finally, the Audi TT has a much longer arm at 13.3cm. The plot below compares the resulting ratios.

SteeringAngle

As you can see, the GTI and S3/Passat spindles are similar with the S3/Passat being a bit quicker. It also shows how much slower the TT spindle makes the steering ratio. The TT suspension was designed as a total system. This shows mismatching components in a system can have cons you need to be aware of.

B.E.T.H.’s New Brain: Raspberry Pi

Half out of future necessity and half out of simply the urge to tinker with something new, I got a Raspberry Pi. I had considered other microcomputers like the Beagle Bone Black, but I decided to go with the Pi because of software/driver maturity and large community. All the peripheral support, drivers, dev tools, etc I’d need for my projects on the Pi has been well sorted out, optimized, and nicely documented. I want to make cool stuff, not be a pioneer of the embedded linux world.

I have a couple of projects in mind for the Pi. The first will be to power my hexapod robot, B.E.T.H. The Pi will have enough grunt to run all my IK and future terrain adaption algorithms as well as do some light machine vision. The second project I think will be a digital dashboard/data logger for my car.

So far i have the Pi up and running pretty well. I’m using the WiringPi libraries to recreate some of the Arduino functions. It was fairly straight forward porting over the original arduino code to C++ on the Pi. I’ve been coding on the Pi directly using the Geany IDE in X. I’m using floating point math to improve accuracy where ever effective.

The overall hardware plan for B.E.T.H. looks like this:

hex

I’m using an Xbee breakout board from Sparkfun to physically connect the Xbee. It only takes power, ground, TX, and RX connected to the Pi’s UART and it works like a champ. Note that the Pi’s UART is configured to run a console output by defualt. You have to disable that functionality before its free to use.

To control the Dynamixel AX-12A servos, I’m using the USB2AX from Xevelabs. Its great due to its small form factor and USB speed optimizations. For software, you use the Robotis Dynamixel SDK.

The BEC is an RC type from Castle Creations. It works perfectly because its small and light, can take up to 25VDC in, and the adjustable output is programmed to 5.1V by default which is perfect for powering the USB hub and Pi. UPDATE: The CC BEC crapped out on me after about 20 minutes. I’m not sure why. I’ve since switched to the Murata switching regulator and it’s been great.

The D-Link DWA-131 USB wifi adapter isn’t necessary for running B.E.T.H., but its needed to SSH/VNC into the Pi or to run the Pi directly and access the network/internet wirelessly. For $20 its worth having. I chose this model because the chipset is supported out of the box by the linux kernel and again, its pretty small.

The last part I needed was a powered Dynamixel hub. This acts as a normal Dynamixel hub but it also provides an easy interface for applying power to the servos. I’ll probably use the set screw terminals as a distribution block for branching power.

My next task is cramming all of this stuff into the hex body!

Project GTI: Background

GTIsmf21

So like I said in the intro, I bought a new Volkswagen GTI in 2010. It’s the perfect car for my needs.  First of all, its a nice, comfortable car. I’m 6’4 and the GTI is the ONLY car (on my interest radar) with factory seats that I’ve sat in that i can clear a helmet in. I can drive it on long road trips without feeling cramped. It has a solid on-center feel that makes long drives on the highway effortless. It has a solid stereo with good features, good utility and cargo space, and good gas mileage. So it fits the daily driver bill.

And most importantly, its fun to drive. Stock, it has decent power and a solid suspension. I did two autoxes on bone stock suspension and was surprised with the results. The car rotated very well and body roll was reasonably controlled. It was fun to drive. So it fits the ‘fun to drive’ bill as well.

Since this is the background post of a project that’s now three years old, I’ll go ahead and get to the good stuff. Here are the mods to date:

Power:

  • APR Stage II flash. More boost, more power! I’m making around 275hp and 310ftlbs at the crank.
  • Ultimate Racing 3″ downpipewith ceramic cat and no resonator. Quicker spool, more top end power.
  • Audi S3 Intercooler. Cooler and more consistent intake air temps.
  • Carbonio Intake. Some noise and who knows what else. 
  • VW Tiguan pipe. Deletes the factory noise pipe which funnels sound into the cockpit. Quicker spool.
  • Neuspeed Turbo-Outlet-Pipe. Replaces the restrictive factory pipe and provies a more secure clamp interface.

Suspension:

  • Bilstein B8 Sport shocks/struts. (MK6 model #s)
  • VW Drivers Gear springs. Linear rate, a little stiffer than stock.
  • Hotchkis 27mm hollow sway bars front and rear. 
  • 034 Motorsport strut mounts. Much stiffer rubber keeps the strut planted.
  • Audi S3 spindles. Forged aluminum, stronger, lighter, and shorter steering arms quicken steering.
  • Whiteline Anti-Lift Kit. Adds castor, reduces front end lift, and stiffens the rear LCA mount.
  • Autotech transmission mount insert

Brakes/Wheels/Tires:

  • Stoptech 328mm ST40 brake kit
  • Stoptech Street Performance pads for daily and autox
  • Hawk DTC-60 pads for track
  • VW Goal wheels (17×7.5″) with Dunlop D1 Star Specs for summer, autox, and track
  • Stock Detroit wheels (18×7.5″) with stock all seasons for winter/off season

Other:

  • Audi S3 smooth underbody tray
  • Audi S3 rear trailing arm underbody covers

Wow, that list really got long after a few years. The boring part is that I think the car is just about done. The springs, shocks, mounts, and spindles is my most recent mod and they really completed the package. The car rides great in daily use and really feels good on track.

Here’s a few of my track and autox videos.